



How to Relieve Back Pain Fast at Home
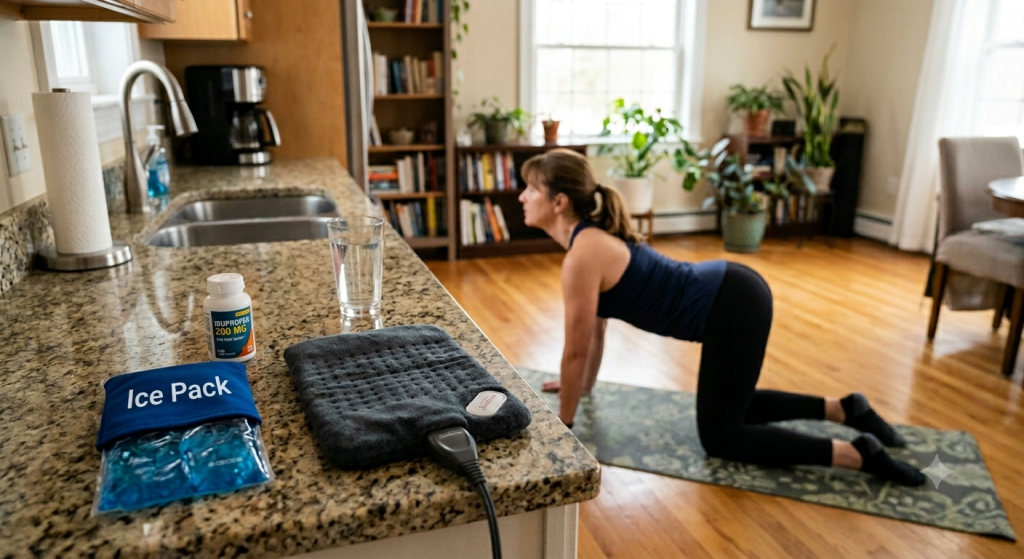
To relieve back pain fast at home, apply an ice pack in 20-minute intervals for the first 48 to 72 hours to calm inflammation, then switch to a heating pad to relax tight muscles and boost circulation. If needed, take an over-the-counter pain reliever (like ibuprofen) for short-term pain management. Perform gentle stretches (like cat-cow and knee-to-chest stretch) and avoid prolonged bed rest, as it can slow healing and worsen muscle tension.
Thankfully, most cases of acute back pain resolve within a few days or weeks of consistent home care. In this article, we’ll explore the methods to try for at-home back pain relief, along with signs you could benefit from professional care.
Why Back Pain Happens: The Most Common Causes at a Glance
Back pain can occur for a variety of reasons, but the most common causes include strains, sprains, poor posture, a sedentary lifestyle, spinal disc problems, and nerve compression.
Muscle Strains and Ligament Sprains
A strain is a stretched or torn muscle (or tendon); a sprain is a stretched or torn ligament (the band of tissue that connects bones to other bones. Back strains and strains account for as much as 97% of back pain complications, according to Health Science Reports. These common injuries can range from mild to severe, but most cases resolve within a few days or weeks.
Back pain from a strain or sprain typically feels achy, tight, or stiff, and it usually gets worse with movement. You may also experience muscle cramps, spasms, and a reduced range of movement in the back.
Poor Posture and Sedentary Lifestyle Habits
Poor posture and prolonged periods of sitting place excessive pressure on the spinal discs and joints. These habits can also contribute to weaker core muscles, which reduces muscular support for the spine. Over time, these effects can increase your risk of developing lower back pain.
Statistics:
- A study of 609 medical personnel published in BioMed Research International found that a sedentary lifestyle caused a 3.5-fold increase in lower back pain incidence.
- A cross-sectional study published in the European Spine Journal found that slumped posture while watching TV was linked to chronic lower back pain at an odds ratio of 3.22, while slumped posture while using a desktop computer was associated with an odds ratio of 1.7.
Disc Problems, Sciatica, and Nerve Compression
While sprains and strains account for most cases of back pain, spinal conditions (including disc issues, sciatica, and spinal nerve compression) are other possible causes.
- Disc problems involve damage to the intervertebral discs that cushion the spine. One common example is a herniated disc, which occurs when the soft disc interior protrudes through a crack in the tough disc exterior.
- Spinal nerve root compression can result from a herniated disc, spinal stenosis (narrowing of the spinal canal), spondylolisthesis, and acute injuries.
- Sciatica is a type of nerve compression; it refers to compression of the sciatic nerve, the body’s largest nerve that extends from the lumbar spine through the buttocks and down the backs of the legs. It’s common, affecting an estimated 10 to 40% of people at some point in their lives, according to StatPearls.
In addition to lower back pain, these spinal conditions may cause neurological symptoms, such as:
- Burning, shooting, or radiating pain (pain that travels from the lower back into the legs)
- Tingling or “pins and needles” sensation
- Numbness
- Weakness
If you experience lower back pain with the nerve symptoms listed above, contact your doctor for professional treatment.
Ice vs. Heat: How to Choose and When to Switch
Heat and cold can both provide rapid relief for some forms of back pain. If you injured your back within the last 72 hours, icing the affected area can quickly bring down inflammation and provide a temporary numbing effect. Heat therapy, on the other hand, can calm muscle tension and boost blood flow to the back, making it a better choice for chronic back pain and back injuries after 72 hours.
Ice: Manage Inflammation in the First 48 to 72 Hours
When and Why: Ice is recommended in the first 48 to 72 hours after an acute injury to manage inflammation. It stimulates vasoconstriction, meaning it constricts blood vessels to reduce the flow of blood and fluid to the injured tissue.
How to: To ice your back, wrap an ice pack or bag of ice cubes in a thin towel and place it on the painful area. Keep it there for up to 20 minutes, and repeat every few hours as needed.
Heat: Loosen Stiff Muscles After 72 Hours
When and Why: Heat is recommended after 72 hours and for chronic conditions to calm muscle tension and increase circulation. A Cochrane review published in Spine involving 1,117 participants found that heat wrap therapy significantly improved pain after five days in patients with acute and subacute lower back pain.
How to: To heat your back, place a heating pad or hot water bottle for up to 20 minutes. Set a timer to prevent falling asleep with a heating pad on, or choose a pad with an automatic shut-off feature.
7 Stretches and Exercises to Relieve Back Pain at Home
The most widely recommended stretches and exercises to calm back pain from home include cat-cow pose, knee-to-chest stretch, child’s pose, pelvic tilts, bridge pose, bird dog, and supine twist.
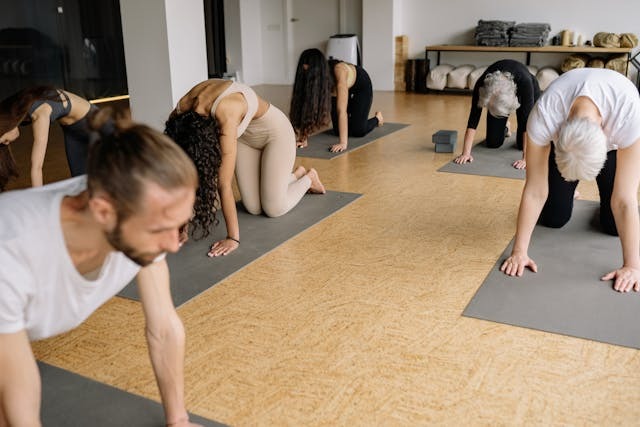
Cat-Cow Pose
Cat-cow pose is a simple yoga stretch that involves moving between spinal flexion and extension, helping to release tension and improve back mobility.
Step-by-step breakdown:
- Start on all fours with a flat back.
- Deeply inhale to curve your back and bring your head toward the ceiling.
- Deeply exhale to draw in your core, arching your back and dropping your head toward the floor.
- Repeat; complete up to three sets of 10 repetitions.
Knee-to-Chest Stretch
The knee-to-chest stretch gently opens up more space in the spine, temporarily relieving pressure on irritated spinal nerves. It also helps release tight lower back muscles.
Step-by-step breakdown:
- Lie down with your knees bent and feet flat on the ground.
- Gently pull one knee toward your chest.
- Hold it for a few breaths, then repeat with the other leg.
- For a deeper stretch, pull both knees to the chest simultaneously.
Child’s Pose
Child’s pose is a resting yoga pose, often used as a breather between more challenging poses during a yoga flow. It gently stretches the lower back muscles, hips, and thighs while promoting deep, restorative breathing.
Step-by-step breakdown:
- Start on all fours. Lower your buttocks to your heels and rest your arms flat on the ground in front of your head.
- Open your knees to rest your torso between your thighs, and rest your forehead flat on the ground.
- Deepen the stretch by taking deep, mindful breaths.
- Stay in this pose for up to 30 seconds.
Pelvic Tilts
Pelvic tilts are a gentle, low-impact exercise to build deep strength in the core, lower back, and glute muscles. They also support lumbar mobility, making them a good choice if you’re actively struggling with a tight, painful back.
Step-by-step breakdown:
- Lie on your back with your knees bent and feet flat on the ground.
- Engage your abdominal muscles to press your lower back flat into the ground.
- With your abs engaged, tilt your hips and pelvis gently upward.
- Hold this position for a few seconds before returning to the starting position.
- Complete 10 sets.
Bridge Pose
Bridge pose stretches tight hip flexors (which can result from prolonged sitting) while gently strengthening the glute, core, and hamstring muscles, all of which support the spine.
Step-by-step breakdown:
- Lie down with your knees bent and feet flat on the ground.
- Engage your core to gently lift your pelvis and back off the ground, creating a straight line with your chest and thighs.
- Hold for a few seconds before slowly lowering your spine back to the ground, one vertebra at a time.
- Complete up to three sets of 10 repetitions.
Bird Dog
The bird-dog exercise safely builds core stability to bolster muscular support for the spine.
Step-by-step breakdown:
- Start on all fours with a flat back.
- Engage your core for stability, then slowly extend one arm straight forward while extending the opposite leg straight behind you. You should create a straight line from your extended arm to your torso to your extended leg.
- Hold for a few seconds, then slowly return to the starting position.
- Repeat with the other arm and leg.
- Complete up to three sets of 10 repetitions per side.
Supine Twist
The supine spinal twist helps release tight lower back muscles and promotes spinal mobility.
Step-by-step breakdown:
- Lie down on your back with your legs extended.
- On an exhale, gently draw your right knee to your chest, keeping your left leg straight on the ground.
- Engage your core to gently lift your hips and shift them slightly to the right.
- Using your left hand, gently send your right knee across your body until it rests on or hovers over the floor on your left side.
- Extend your right arm straight out to the side, at shoulder height, and gently turn your head to look at your right hand.
- Hold this position for several deep breaths (up to a minute) and repeat on the other side.
Medications for Fast Back Pain Relief: Understanding OTC Options
Many people reach for over-the-counter (OTC) pain medications for quick back pain relief. But before taking medication, it’s crucial to understand the options available to you, and the possible side effects, to find the right solution for your needs.
Let’s discuss the most common OTC medications for back pain: NSAIDs, acetaminophen, and pain-relieving topicals.
NSAIDs: Ibuprofen (Advil) and Naproxen (Aleve)
Best for: Managing inflammation and pain
NSAID stands for non-steroidal anti-inflammatory drug. This type of drug works by blocking your body’s production of the enzymes that produce prostaglandins, the chemicals that cause inflammation and pain. Two of the most widely used OTC NSAIDs for back pain are ibuprofen and naproxen.
| Ibuprofen vs. Naproxen for Back Pain Relief | ||
| Drug | Ibuprofen | Naproxen |
| Onset | ~30 minutes | ~30 minutes |
| Effect Duration | 4 to 6 hours | Up to 12 hours |
| GI Side Effects | Slightly gentler on the stomach | Higher risk of GI side effects |
Generally speaking, ibuprofen is a better choice for a lower risk of stomach upset, while naproxen is preferable for less frequent dosing (for example, if you need the effects to last through the night without waking up to redose).
Acetaminophen (Tylenol)
Best for: Pain relief that’s gentler on the stomach
Acetaminophen works as a pain reliever and fever reducer, and it’s an over-the-counter option for mild to moderate pain.
Since NSAIDs help reduce inflammation, they’re generally more effective for back pain. However, your doctor may recommend acetaminophen instead if:
- You struggle with GI issues and need an option that’s gentler on the stomach
- You have chronic kidney disease or reduced kidney function, as NSAIDs are processed through the kidneys
- You’re taking blood thinners (NSAIDs can increase the risk of bleeding)
Topical Analgesics: Creams, Patches, and Gels
Best for: Local pain relief to avoid systemic side effects; greater availability of drug-free, holistic options
Topical analgesics provide localized pain relief, making them a good option for people who want to avoid the systemic (full-body) risks and side effects associated with oral medications. Additionally, some topical solutions use drug-free formulas with natural pain relievers (like menthol and essential oils), which may appeal to those looking to take a less aggressive, more holistic approach to back pain.
Pain relief patches (like lidocaine patches) are less messy to apply than gels and creams and provide continuous relief. Gels and creams allow you to apply the formula wherever you need it.
| Comparing Pain Relief Topical Ingredients | ||
| Ingredient | Classification | How it Works for Pain |
| Menthol & Camphor | Counterirritant | Creates cooling sensation that blocks pain signals from reaching the brain |
| Lidocaine | Topical anesthetic | Temporarily numbs treatment area |
| Diclofenac sodium (Voltaren) | Topical NSAID | Reduces inflammation and swelling |
| Capsaicin | Nerve desensitizer | Creates warming sensation; gradually reduces chemical that sends pain signals to brain |
Foam Rolling and Self-Massage for Back Pain
Especially for back pain caused by tight or sore muscles, foam rolling and self-massage can help calm back pain. These methods also encourage blood flow to the back to support healing.
How to Use a Foam Roller on the Lower Back
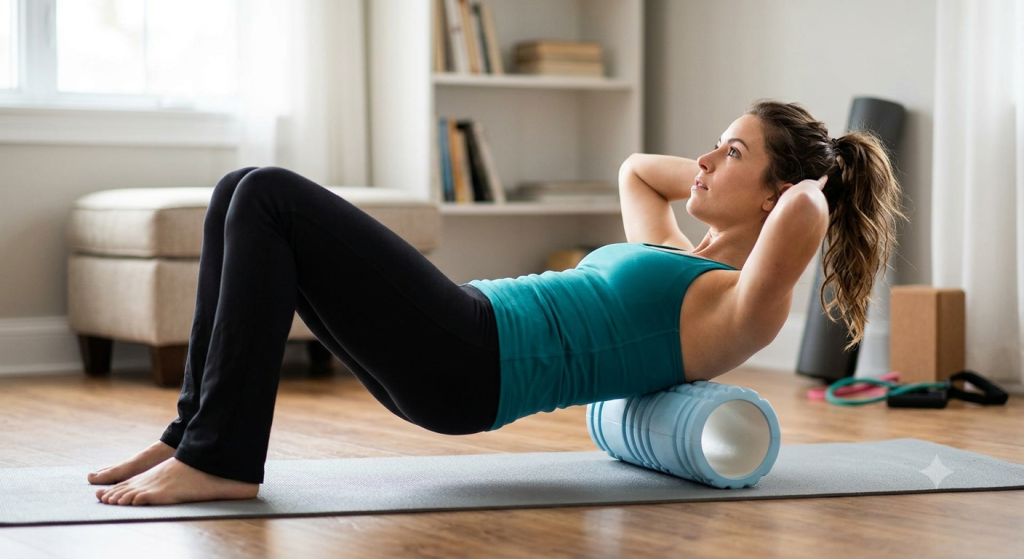
Foam rolling your upper back, glutes, and the muscles to either side of your spine can help you gently gain mobility and release pain. Make sure to not place the roller directly under the curve of your spine, as this can cause hyperextension and worsen pain.
Upper Back Roll
- Position the roller beneath your shoulder blades, horizontally across the upper back.
- Bend your knees and press your feet flat into the floor.
- With your hands behind your head, lean back and raise your hips to move the roller up.
- Focusing on sensitive areas, slowly move the roller toward your shoulders, then move it slowly back down to the starting position.
- Repeat as needed.
Upper Back Stretch
- Lie down with a roller positioned vertically under the spine, so that it supports your head and pelvis. Your knees should be bent with your feet flat on the floor.
- Extend your arms out to your sides, palms up.
- Breathing deeply, remain in this stretch for up to one minute.
Lower Back Stretch
- Lie on your back and position the foam roller horizontally across your lower back, with your knees bent toward your chest and your hands over your shins or under your thighs.
- Gently rock to one side, raising one side of your lower back off the roller.
- Hold for a few seconds, then gently shift to the other side.
- Repeat for up to one minute.
Glute Roll
- Position the roller horizontally across your lower back, and sit on top of it so that it’s under your sit bones. Bend your knees with your feet flat on the floor.
- Place your right hand behind you for support, and position your right ankle across your left knee in a figure 4 shape.
- Place your left hand on your right ankle and lean slightly to the right until you feel a gentle stretch in the glute muscles.
- Roll across the glutes, spending extra time on tight areas (up to 30 seconds per area).
- Repeat on the other side.
Tennis Ball Trigger-Point Release
A trigger point is a sensitive point of tight tissue (also called a knot) in a muscle’s fascia, the connective tissue that surrounds every muscle, organ, bone, nerve, and blood vessel in your body. Trigger point release (also called myofascial release) is a method of relaxing these points to relieve pain. You can use a tennis ball to help release trigger points from home, although using proper methods is crucial for safety and effectiveness.
- Lie on your back with your knees bent and your feet flat on the floor.
- Place the tennis ball under the painful area of your back (only place it under soft tissue, like the muscles on either side of the spine, not directly under the spine itself).
- Inhale deeply, and exhale to relax onto the ball.
- Remain in this position for a few seconds, gently roll the ball around, or position the ball in a new spot.
- If you’re unable to lie down, you can use this technique against a wall.
Safety Tips for Safe Self-Massage
- Avoid placing a ball, foam roller, or any other self-massage tool directly under bone, as this can lead to bruising and pain.
- Pay close attention to how you feel throughout the massage. While a little discomfort is to be expected, stop right away if you experience sharp, intense, shooting, or burning pain.
- When in doubt, consult a medical professional for further guidance.
The Best Sleeping Positions for Lower Back Pain
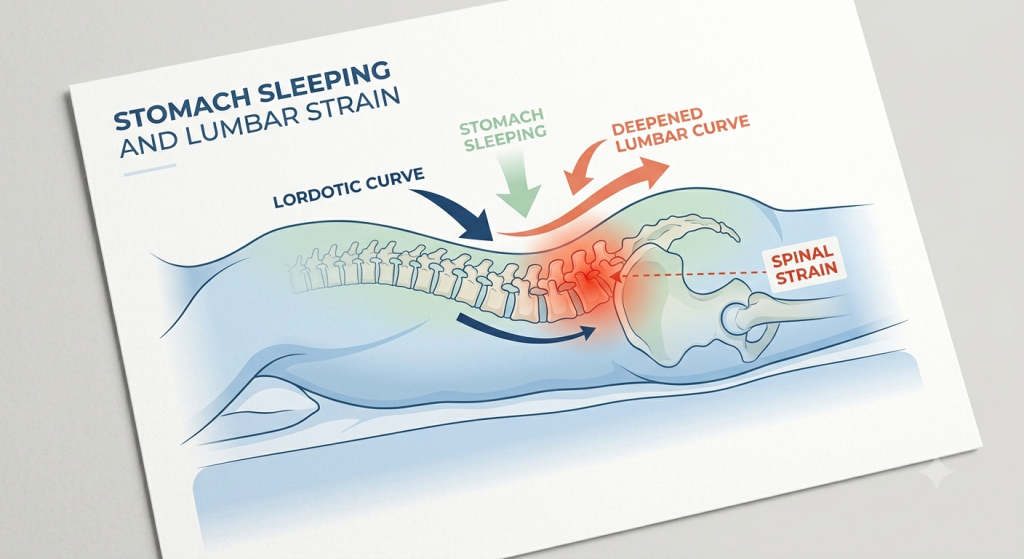
The best sleeping positions for lower back pain are on your back or side; the worst position is on your stomach.
Back Sleeping: Pillow Under the Knees
Sleeping on your back keeps your spine aligned throughout the night. Positioning a pillow under your knees offers extra support by encouraging your back muscles to relax.
Best mattress for back sleepers: Medium-firm to firm. This keeps your hips from sinking into the mattress, which could throw your spine out of alignment.
Side Sleeping: Pillow Between the Knees
If you find side-sleeping more comfortable, bend your knees slightly and place a pillow in between them. Don’t tuck your chin; your head should be aligned with the rest of your body to keep the spine aligned.
Best mattress for side sleepers: Medium to medium-firm. This provides enough cushioning to keep your hips and shoulders comfortable, but enough support to maintain spinal alignment.
Why Stomach Sleeping is the Worst Sleeping Position for Lower Back Pain
Stomach sleeping is the worst sleeping position for lower back pain because it deepens the natural curve of the lumbar spine, straining the back muscles, spinal discs, nerves, joints, and ligaments. It can harm your cervical spine (neck), too, because it forces you to sleep with your head rotated to one side. Remaining in this position for several hours (a night of sleep) can quickly lead to back stiffness and pain.
Stress, Sleep, and the Mind-Body Back Pain Connection
Stress and poor sleep quality can compound on back pain, leaving you more sensitive to pain and muscle tension.
How Chronic Stress Affects the Back Muscles
Prolonged stress is a possible factor in back pain, as your body’s “fight or flight” response triggers muscle tension and increased pain sensitivity. While occasional stress is normal and unlikely to contribute to ongoing back issues, chronic stress can play a role in back pain.
In a cross-sectional study published in Scientific Reports, among people with chronic lower back pain, 19.3% reported no stress, compared to 25.6% of those without chronic lower back pain. Moderate and severe stress were significantly more common in the chronic lower back pain group (23.4% and 6.7%, respectively).
How Sleep Quality Supports Healing
Sleep quality is fundamental to your body’s healing process. High-quality sleep allows your body to:
- Manage systemic inflammation
- Reset pain levels (poor sleep quality is linked to increased pain sensitivity)
- Release growth hormones to stimulate tissue repair and regeneration
- Relax your voluntary muscles to prevent tension and spasms
Why Bed Rest Isn’t Recommended for Back Pain
Bed rest (particularly periods of bed rest lasting longer than two days) isn’t recommended for back pain because it can cause tighter, weaker muscles. It also curbs blood circulation to the back, which can slow healing by reducing the flow of oxygen and nutrients to the damaged tissue. Even after surgery, doctors recommend standing and taking short walks as soon as possible after the procedure to support your recovery.
Safe, gentle movement is the name of the game. Don’t push through pain to stay active; instead, find activities you can safely participate in without pain, such as short walks, light aerobics, and gentle stretching.
Posture and Ergonomics: Daily Habits that Contribute to Pain
Posture, workplace ergonomics, and safe lifting techniques help prevent back pain by preventing excessive strain on the spinal structures and surrounding muscles.
Workplace Ergonomics and Sitting at a Desk
If your job involves sitting at a desk throughout the workday, spine-friendly workplace ergonomics are a must to prevent back pain. Prioritize:
- An ergonomic desk chair with robust spinal support to encourage proper seated posture
- Using a standing desk, or taking breaks from sitting every 30 minutes
- Positioning your screen at eye level to ensure your cervical spine is properly aligned while you work
- Avoiding asymmetrical or awkward postures (place a reminder at your desk to remember your posture, even during periods of intense focus)
Standing Posture and Footwear
While sitting posture is often prioritized for back pain prevention because many of us spend hours each day sitting at a desk, standing posture matters, too. The ideal standing posture involves:
- Centering your head over your shoulders, making sure not to jut your chin forward
- Relaxing your shoulders and drawing them down and back (make sure they’re not rounded forward)
- Maintaining the spine’s natural alignment, engaging the abdominal muscle slightly to avoid deepening the lumbar curve
- Maintaining a neutral pelvic position (not tucked or swayed)
- Keeping your feet shoulder-width apart and your weight distributed evenly between them
If you find yourself having to stand for long periods throughout the day, consider your footwear carefully. The best footwear for standing all day is a highly cushioned, stable design with robust arch support. Look for extra cushioned midsoles if you struggle with heel or joint pressure during long days on your feet.
How to Lift Safely with Back Pain
If you’re struggling with back pain, it’s best to avoid heavy lifting until your back heals. To prevent future flare-ups, follow these safe lifting tips:
- Lift with your legs by hinging at the hips and knees; this transfers the weight from your spine to the buttocks and leg muscles.
- Engage your core muscles before lifting to protect the spine.
- Keep the weight as close to your body as possible to minimize strain on the lumbar spine.
- Keep your spine aligned in a neutral position as you lift.
- Never twist your torso while lifting a heavy load. Pivot your body altogether, without twisting, if you need to turn.
Weight Management and Spinal Load
In individuals who are overweight or obese, weight loss may improve lower back pain by reducing the physical load on the spinal discs, joints, nerves, and other tissues. Obese adults had a 55% higher likelihood of lower back pain, and overweight adults had a 21% higher likelihood, compared to normal-weight adults, according to the Journal of Manipulative and Physiological Therapeutics.
Safe, sustainable weight management methods are crucial for back pain prevention. Along with a low-impact exercise routine, many medical professionals recommend an anti-inflammatory or Mediterranean diet, which focuses on:
- Vibrant fruits and vegetables
- Legumes
- Whole grains
- Fatty fish
- Nuts and seeds
- Olive oil
The anti-inflammatory diet limits:
- Red and processed meats
- Processed foods
- Added sugars
- Refined carbohydrates
- Trans fats
Red Flag Symptoms: When Home Care Isn’t Enough
Home care isn’t always enough to resolve back pain. Call your doctor to schedule an appointment if your pain hasn’t improved (or has gotten worse) after a week or two of home care, or if you experience neurological symptoms like radiating pain, tingling, numbness, or weakness.
Warning Signs: When to Go to the ER
Rarely, back pain is a symptom of a medical emergency. Go to the ER for emergency care if you experience:
- Sudden, severe neurological changes (numbness, weakness, or tingling)
- Changes in bowel or bladder function
- Saddle anesthesia (numbness in the inner thighs, groin, and buttocks)
- Unexplained fever or weight loss
When You Need Specialist Care
Conditions that demand more serious treatment for back pain include spinal stenosis, spondylolisthesis, herniated disc, osteoarthritis, spinal tumors, and spinal fractures.

While these conditions don’t necessarily require surgery, they need to be diagnosed by a physician to start the healing process. After the diagnosis, your doctor can recommend a professional treatment plan, which may involve physical therapy, lifestyle modifications, and prescription medications to manage your pain.
Regain your mobility with Premia Spine! Contact us now
David danced at his son’s wedding Bonnie explains why TOPS surgery was the right decision for her Wade is back to hiking Scott speaks about going to surgeryRegain your mobility with Premia Spine!



Sometimes, conservative treatments don’t provide results for serious spinal conditions. In these cases, you may need to consider surgery to resolve your pain and restore your quality of life. Thankfully, medical innovations like the TOPS System are making back surgery less invasive and more sustainable for patients today. TOPS is a dynamic spinal implant that has earned a superior-to-fusion claim from the FDA for its ability to establish a controlled range of spinal motion after decompression surgery.
Find a spine expert in your area to receive specialist care for back pain that doesn’t resolve with home care.
FAQs: Back Pain Relief at Home
How quickly can back pain go away at home?
While timelines can vary dramatically based on the specific condition/injury, age, and overall health, among other factors, back pain can go away at home in as little as one to two weeks.
What’s the fastest way to relieve back pain?
The fastest way to relieve back pain is to apply an ice pack to the area for 20 minutes, perform gentle stretches to release tight back muscles, or take an OTC pain reliever.
Should I heat or ice for back pain?
Use ice in the first two to three days after an injury; use heat 72 hours after an injury to relax tight back muscles and boost circulation.
When should I see a doctor for back pain?
See a doctor for back pain that doesn’t improve within a week or two of at-home care, disrupts your routine, or occurs with other symptoms like numbness, weakness, tingling, and difficulty walking.
Can stretching make back pain worse?
Yes, if it’s done improperly, too aggressively, or without regard to the underlying condition (spinal conditions, like herniated disc, may worsen with certain stretches that aggravate the spinal nerves).
